Wednesday, June 2, 2010

Waterberry hits the road...

Well not Waterberry, it's still right there in Slocomb, but the farm has been shut down for the summer. After all these years of farming we decided it was time for a break from working. So we've closed up the greenhouses, packed up the camper, and hit the road! We're on our way to Alaska for the summer. Yup, we're driving all the way to Alaska. Once there will be spending the summer volunteering at Camp Victory in Sutton.


Don't worry we'll be back sometime in September and be ready to start growing again, but for now this is our home!!


.For updates on our trip and highlights from our summer, check out our other blog at www.lifeintheotherla.blogspot.com

Friday, May 7, 2010

How to freeze strawberries

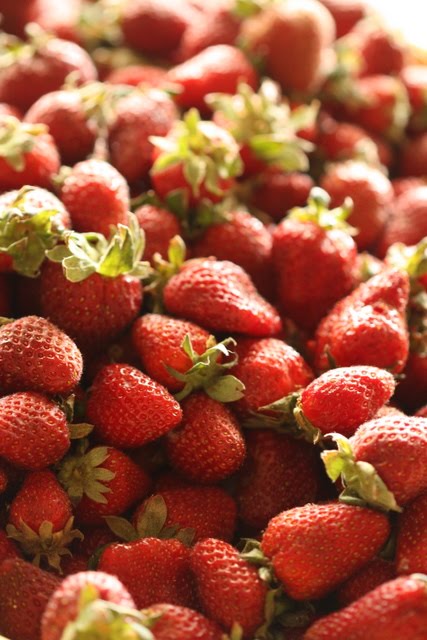
 Our strawberry season at Waterberry, will soon be just a memory. It's sad to see the berry season wind down and the last of the berries picked. Luckily, we know we've got berries put away that we'll enjoy through out the rest of the year. Strawberries can be made into jams or preserves, but the easiest way to preserve strawberries is freezing. There are a couple of different methods that can be used for freezing your fresh strawberries.
The first, and by far the most simple way to freeze your strawberries is, freezing the whole berries. This is the best method for very ripe, red berries. Wash and sort the berries, discarding any bad berries. Hull the berries (remove the green tops and stem) and place the whole hulled berries into plastic freezer bags. Lay the bag flat and try to have the berries in a single layer. Gently push as much air out of the bag as you can, taking care not to crush the berries. I stack mine on a cookie sheets and put them in the freezer. This way they stay nice and flat and be much easier to stack in the freezer, once frozen.

Another way we like to freeze our strawberries is, sliced with a little sugar. This method is great for slightly under ripe or not very sweet berries. It's also great for berries that you plan on using in smoothies. Clean the strawberries the same as for the whole berries, removing the stem and tops. Then slice or quarter the berries into a large bowl. Add about 1/2 cup of sugar for each quart of strawberries you have in the bowl. If your berries are already very sweet you may want to use only about 1/3 cup sugar per quart of berries. Gently stir the sugar into the sliced strawberries. Bag the sugared berries in plastic freezer bags immediately, laying the bags flat on a cookie tray. Gently press out any excess air  form the bags. Place in the freezer. The sugar will begin to draw the juice out of the strawberries, so you want to get them in the freezer fairly quickly.


There are a couple of other freezing methods for strawberries, but these are the two that we use and have found to be the most successful for our needs.
Freezing strawberries is so easy, you have no excuse not to have your own stash of frozen berries!

Monday, February 15, 2010

Snow Day!

It only happens once every ten to twenty years but it snowed here at Waterberry farm this week! It only lasted about a day, but it turned our farm into a winter wonderland. Here a a few pictures from our snow day.

Wednesday, September 23, 2009

Summer's over


Well its been a great summer here at Waterberry Farm. We stayed busy with the Farmers Market until August and then took a short break from growing in order to get the greenhouses and systems clean and ready for the Fall season.

Last week we hosted a potluck supper on the porch, as a thank you for all those that volunteered and participated in the Poplar Head Farmers Market this summer. Thanks to everyone's hard work the Market was a huge success.  A big thank-you to the First Baptist Church volunteers. They were an amazing group of people. They arrived bright and early every Saturday with smiles on their faces and worked in 100 plus degree heat without a complaint. We couldn't have done it with out the help and support of the volunteers and of course we wouldn't have a market without our farmers.Thanks to all that participated and I can't wait till next year!


It had rained most of the day but the sun came out just before everyone arrived and it was a perfect evening!


Friday, June 26, 2009

farmers market


Farmers markets are in full swing in our area. Look for Waterberry Farm at the Poplar Head Farmers Market in downtown Dothan every Saturday in June and July. The market opens at 8:00 a.m. and you better get there early if you want any of our produce and baked goods. We sell out fast!
This week at the market we'll have our wonderful Waterberry Bib lettuce, heirloom tomatoes, basil, Waterberry pesto, heirloom tomato relish, and a variety of artisan breads. This week we'll be selling strawberry-lemon and lime aid, featuring our hydroponic strawberries. Stop by for one of these refreshing drinks as you stroll through the market!

See you at the market!

Saturday, May 16, 2009

Spring Peas

Every year since I was tiny the first signs of spring was the harvesting and freezing of peas and my favorite thing was to eat those sweet little peas raw from the shell.
For us here in the deep South our first peas can be picked as early as the first week of May and here at the farm our peas are ready. As with all foods when they are in abundant supply it's time to think of fun new ways to eat them. One of my favorite peas recipes came from Gourmet several years ago Crostini with Roasted Garlic Pea Puree kind of like a fresh peas hummus this makes a great spring appetizer.


Ingredients
1 head garlic, unpeeled
¼ C olive oil
1 baguette, cut diagonally into 1/2-inch-thick slices
1 ½ C fresh peas OR a 10-ounce package frozen peas, cooked and drained
a large piece of Parmigiano-Reggiano
2 tsp fresh lemon juice
3Tb water

Preparation
Preheat oven to 400°F.

Cut 1/2-inch off top of garlic head and put head on sheet of foil. Drizzle 1 tablespoon oil over garlic and wrap tightly in foil. Roast garlic in middle of oven until very soft, 30 to 40 minutes, and cool.
While garlic is cooling, arrange baguette slices in one layer on a large baking sheet and brush lightly on each side with additional oil. Bake slices in middle of oven until crisp and pale golden, 5 to 10 minutes, and transfer to rack.
Squeeze roasted garlic from head into a food processor add peas, cheese lemon juice and 1Tb olive oil and salt and pepper to taste. Blend pea mixture until smooth adjusting consistency with water 1 TB at a time.
Spread toasts with about 1 heaping tablespoon pea purée on each toast and top with shaved Parmigiano-Reggiano. Drizzle with remaining oil.
yield: Makes about 24 crostini

When buying peas choose fresh peas with crisp, smooth, glossy, bright green pods. Avoid any that are wilted, dried, puffy or blemished. For the sweetest flavor, try to purchase them from a farmers market. Plan on using fresh peas as soon as possible after purchase as their natural sugars will convert to starch soon after picking. Peas will stay fresh in a plastic bag in the refrigerator crisper for 3-4 days but don't expect them to keep their characteristic sweetness for more than a day.

Shell the peas just before cooking to prevent them from drying out. Working over a large bowl, squeeze the pod and press your thumb against the seam to split it open. Continuing the same movement, sweep your thumb down along the inside of the pod to pop out the peas.
To preserve the sweetness of your fresh peas blanch them in boiling water until they turn bright green about 1minute, remove from the hot water and rinse with cold water to stop the cooking. At this point they are ready to use in your favorite recipe or put into zip lock bags to freeze for a bit of spring next winter.

Monday, May 11, 2009

Freezing Corn 101


Every year I look forward to my first ear of fresh sweet corn. It's wonderful! Too bad the season for corn is only a few short weeks a year. Freezing freshly harvested corn allows you to preserve it at it's peak of flavor.
In our area farmers are already beginning to harvest the first of this years corn. We came across some very nice sweet corn at a great price and decided to freeze some for the rest of the year. We bought 3 cases that had between 55-75 ears per case. Freezing corn is quite simple, you just need to follow a few basic steps. I took pictures of the process. Here is corn freezing 101:

The first step is to get very fresh sweet corn. If your not picking the corn yourself, try to get corn that was picked within a day or two of when you plan to freeze it. The sugars in the corn begin to turn to starch as soon as it's picked. So the sooner you freeze the corn after its been picked, the more sweetness it will retain. The ears should not be too large. Very large ears are also typically less sweet.
The next step is to husk the corn. This is my least favorite part of the process. Luckily for us my Dad is a husking machine!

After the corn is husked it needs to be cleaned to remove as much of the silk as possible. A very soft vegetable brush works best for this step.

The next step is to blanch the corn. Bring a large stock pot filled about half full with water to a boil. When it boils add as many ears as you can fit making sure they all stay submerged in the water. Adding the corn will stop the boiling process. Place a lid on the pot. Allow the corn to come back to a rapid boil. This may take 10 minutes or more. Keep an eye on the pot because once it reaches a boil the corn is blanched. Remove the corn immediately from the hot water using tongs.Since you will more than likely need to blanch your corn in multiple batches, you will want to save the hot water in your stock pot. This not only conserves water but also greatly shorten the amount of time it takes to bring the water to a boil. You may need to add more water to your pot as you go.

While your waiting for your corn to come to a boil you need to prepare for the next step which is cooling the corn. Fill your sink with cold water. If you have a two compartment sink, fill one side with cold water and the other side with ice water. If you don't have a two compartment sink you can fill a large bowl or tub with the ice water.

Place the corn into the sink filled with cold water. After the corn is blanched it is critical that it is placed immediately into cold water. This will stop the cooking process. You will lose your fresh corn flavor if you allow the corn to cook to much. Next transfer the corn to the ice water and allow it to cool completely.
The next step is cutting the corn from the cob. This is the only step that requires a little skill. After doing a couple of ears, you'll get a feel for how to get the corn without cutting into the cob. A small sharp knife is the important key for this step. A pairing or vegetable knife works best. After you cut off all corn from the cob, turn your knife so that the blade face outward and scrape down the cob. This will remove all the sweet juice and bits of corn that remain on the cob. This step is a bit messy but you'll be getting every bit of your sweet delicious corn off the cob. You will need a large bowl to cut into. I find it works best if I place the bowl in my lap while I cut off the corn. Do whatever feels comfortable to you.


After you finish cutting off the corn from the cobs, scoop the corn into zip lock freezer bags. I used quart sized bags which will hold enough for 4-5 servings. For smaller servings use a pint sized bag. Lay the bag on it's side and flatten out the corn. Press out as much air as possible before closing the bag. Flattening the bag not only helps you to remove the air but it also makes it much easier to stack the corn into your freezer.

Place bags into the freezer and enjoy your sweet corn all year long!


Even the dog got in on the action! She stole three cobs from the tub. All the rest went to some very happy cows!