Tuesday, June 11, 2013

The Farmhouse at Waterberry Farm

There's always something going on here at Waterberry Farm, however June is when things go into overdrive! The Route 52 Farm Trail kicks off June 1 and that keeps things really hopping around here until August. Participating in the farm trail is a blast. We feel like we make new friends every week! Last summer we set up tables and sold our produce and baked items under the trees, which is great when the weather cooperates!
This year we've made a few changes. We've cleaned up the old yellow farmhouse that's served mainly as storage in the past. It's been a quite a bit of work but now if one of those notorious Southern storms blows up, we won't be scrambling get everything out of the rain! It's given us a great place to sell our produce and baked goods.
Introducing The Farmhouse at Waterberry!
We've also added two local artisans this year. Mary from Fat Bird Designs is back again this year with her hand painted tea towels, table runners, and napkins. She also sells hand drawn cards and many other hand made gift items.
Two original paintings by Fat Bird Designs
 This year we are also joined by Sharon from Beatrice and Lulu. Sharon makes all kinds of hand made children's clothing from heirloom dresses to every day wear. She also makes hand made dolls, adorable market bags, and the CUTEST monogrammed hats ever!  She's got some other things in the works for later this summer. I can't wait to see what Sharon comes up with next. Check out her website for more info www.beatriceandlulu.net


Come on out this Saturday from 8-12 and see what's going on at Waterberry. You won't want to miss it!


Monday, June 3, 2013

The Route 52 Farm Trail Map 2013

It's June so that means time for the Route 52 Farm Trail to begin again. We are excited to be a part of this event. The Route 52 Farm Trail is a collaboration of small family farms in the Slocomb, AL area. We are all open on to the public Saturday mornings from 8-12. We encourage visitors to make it a road trip and visit each of the farms on the trail! The map below gives a list of the participating farms and where they are located. You can visit the farms in any order you want. Each farm has something unique to offer, so you won't want to miss any of them!
Here at Waterberry you can pick up fresh, pesticide free hydroponic butterleaf lettuce, tomatoes, free range eggs, herbs,  homemade breads, and a large variety of baked goodies. This year at Waterberry we've added a two local artisans that will be selling beautiful hand made goods each week. We are located at 1521 N. Morris St. Slocomb, AL. Look for the old yellow farm house, that's us!
Be sure to "Like" us on Facebook to keep up with what's going on at Waterberry and on the Route 52 Farm Trail!

Tuesday, August 28, 2012

Eating Alabama

In the spring of 2008 we got a visit on the farm from Andrew and Rashmi Grace, a young couple from northern Alabama. They had just begun a year long journey of forgoing the grocery store and eating completely locally grown foods. The Grace's planned to eat only food that they'd grown  themselves or they could buy from farms within Alabama. Read about the start of their journey here on their blog Eating Alabama. Their search for fruit grown in Alabama brought them to Waterberry. They picked up some strawberries and lettuce from us. During their visit to the farm they asked if they could film our farm and greenhouse. Little did we know that one day our farm would be a part of a film they where working on. Eating Alabama is a documentary chronicling their year of eating seasonally and locally in an attempt to rediscover their family history of farming.
The Grace's hope to show people through this documentary how food we eat matters. “I hope people get a sense of how difficult farmers have it and how hard they work,” Grace says, “and that they will try to make choices—even small ones—that will lead to change.”
Can't wait to see this film!


Tuesday, June 26, 2012

Lots of eggs? Make a quiche!

Back in late winter/early spring, we added a few new residents here on the farm. We now have 20+ of these lovely ladies residing here at Waterberry. Since then we've received lots of beautiful fresh eggs, everyday. The chickens each lay an egg almost everyday, which adds up fast! A quiche is a delicious way to use some of those beautiful eggs. Quiches are so versatile. You can add in almost anything you have on hand. This one was made with bacon, spinach, Swiss cheese, and onions, but you could substitute ham for the bacon, add any kind of cheese, add in some mushrooms etc... the combinations are almost endless! 


For the crust:*
2 cups flour
1⁄4 tsp. salt
8 tbsp. cold butter, cut into small pieces
3 tbsp. cold vegetable shortening, cut into small pieces

The filling:
6 slices bacon, crisply cooked, crumbled
1 cup shredded Swiss cheese
1 large handful of fresh spinach
1/3 cup finely chopped onion
4 large eggs, preferable farm fresh free range eggs
1 1/2 cups whipping cream or half-and-half
1/4 teaspoon salt
1/4 teaspoon pepper
1/8 teaspoon fresh nutmeg

For the crust: Put the flour and salt into a mixing bowl. Use a pastry cutter or two knives to work butter and shortening into flour until it resembles coarse meal. Sprinkle in up to 6 tbsp. ice water, stirring the dough with a fork until it just begins to hold together. Using your hands, press dough firmly into a rough ball, then transfer to a lightly floured surface. Give the dough several quick kneads with the heel of your hand to form a smooth dough, then shape into a ball, flatten slightly to make a round, and dust with flour. Wrap round in plastic wrap and refrigerate for 2 hours.

Preheat oven to 400°. Allow dough to soften slightly at room temperature before rolling out on a lightly floured surface into a 14'' round. Fit dough, into a 9" pie pan Press overhanging dough down slightly into sides of ring to make the sides of the crust a little thicker and sturdier, crimp the edge to make a decorative crust. Using a fork, prick bottom lightly. Place the crust into the refrigerator to chill about 20 minutes. Line dough with buttered aluminum foil, then add pie weights or dried beans. Bake until crust is set and edge just begins to color, about 20 minutes. Remove foil and weights, and continue baking until crust is pale golden, another 2-5 minutes.

Lower oven temperature to 375°. In a skillet cook the bacon until browned and crispy. Pour off all but 1 tbsp. of the bacon fat, add the onion and cook until tender, about 2 minutes, add the spinach and saute until its wilted down. Sprinkle cooked, crumbled bacon over the bottom of the baked quiche crust. Add the shredded cheese and onion spinach mixture. In a bowl whisk eggs, cream, and salt together and season to taste with nutmeg and pepper. Pour mixture into crust and bake until custard is puffed and golden and just set in the center, 30-35 minutes. Serve quiche warm or at room temperature, sliced into wedges.


*You can use a store bought crust, if you want. However, here's a tip for making a quiche in a homemade crust in a hurry: keep 1 or 2 pie crusts, ready to go in the freezer. Make the crust, put it into your pie pan, wrap the unbaked crust well with plastic wrap and freeze until you want to bake your quiche. Then just take it out of the freezer and proceed with the recipe.

Sunday, June 3, 2012

Farm Trail opens!

Yesterday was the first day of the Route 52 Farm Trail. It was a gorgeous day. Sunny, cool, pretty close to perfection weather wise. We weren't quite sure what to expect. Would anyone want to make the trek out to all the farms? What if no one shows up? We figured we'd be eating a lot of focaccia and pesto if no one came, so not a total loss! Well our first customer showed up at 8am, just as we started to set up our tables, and they came in a fairly steady pace all day. We had a great time meeting new people and enjoyed the chance to show off what we do here at Waterberry. Thank you to all of you that came out! We can't wait till next Saturday to do it all again. Come on out to the farm this Saturday from 8am-2pm. Get Real Food on Route 52!!
Our sun dried tomato and rosemary focaccia
Which is amazing with some our pesto and one of our fresh from the vine tomatoes!
Come see us Saturday from 8am-2pm.

Sunday, May 27, 2012

Route 52 Farm Trail


There's a lot going on at Waterberry right now. We're excitedly getting ready for the first weekend of the Route 52 Farm Trail! The Route 52 farm trail is a a collaboration between several small family owned farms in our area. Each of the farms on the trail has a strong commitment to environmentally friendly, sustainable farming practices. All of the farms on the trail will be open to the public every Saturday in June and July from 8am-2pm. Our goal is to bring our customers the freshest, highest quality food possible. Waterberry will be selling lettuce, tomatoes, herbs, potted plants and flowers, fresh baked good, fresh eggs etc... All of our produce is grown without the use of herbicides or pesticides. If you live in the Wiregrass area, make plans to hit the Route 52 farm trail and visit all the participating farms. Get Real Food on Route 52!
Like us at facebook.com/52trail

Tuesday, May 15, 2012

Canning Classes


The best way to eat locally all year is to can, preserve, or freeze fresh foods while they are in season. We are now offering canning classes to help you preserve a bit summer all year round. 
Sign up to join us May 22 or 24 to learn to make and can strawberry jam. We will be teaching the old fashion method of making jam and preserves without pectin. We will walk you through the basics of boiling water bath canning. Class will include information on food safety, best canning practices, trouble shooting when something goes wrong, recommendations on how to store your newly canned goods and much more.
In this class you will learn to make Strawberry Jam, go home with a jar of jam, as well as printout of the recipe and lots of new knowledge! Hurry and sign up before the classes fill up.

Class info:
Tuesday May 22 10am - 12 Making Strawberry Jam
Cost $25.00 per person
Class sizes are limited to 10 


Thursday May 24 10am - 12 Making Strawberry Jam
Cost $25.00 per person
Class sizes are limited to 10 

Classes will be held at Waterberry Farm in Slocomb.
Call 334-886-2454 or email me at paulahennig@msn.com to reserve your spot. Be sure to "like" us on Facebook to keep up with what's happening at the farm. 

Monday, May 7, 2012

Herb Can Caddy

We have these herb caddies for sale at the farm. The caddies are 6 painted cans that are attached to the wooden handle. The cans are filled with 4 herbs plants and 2 flowers. These little caddies make the perfect patio kitchen garden. They are just $15.00! Call to pick one up today!

Sunday, April 22, 2012

Mint Iced Tea

This is the tea that was on our Easter menu. Sweet tea has been called the table wine of the South, well we've upped that table wine a notch with this mint tea. It's so refreshing and delicious but be warned this tea is ADDICTIVE! Enjoy...but don't say you weren't warned!

Mint Iced Tea

Method:

Bring one quart of cold water just to a boil (not a rolling boil, just before). Remove from heat. 
Add tea bags ( I used 2 of the family size Luzianne Tea bags)
Let steep for about 10 minutes.
meanwhile bring another quart of water to a boil.
Add a large handful on fresh mint to the water remove from heat and cover pot, if using an open pot.
Allow mint to steep for 10-15 minutes.
Pour tea into a large pitcher. Add steeped mint poured through a sieve into the tea. This just catches the mint and keeps you from having to fish it out of the pitcher!
Add a about quarter of a can of lemonade and a about quarter of a can of orange juice concentrate to the mint tea
Stir in 3/4 cup of sugar (it seems like a lot but it really does take a good bit of sugar) Taste, add more sugar if you think it needs it.
Chill and serve over lots of ice!

Monday, April 9, 2012

Easter


The Menu:

Spiral Ham
Mom's Potato Salad
Roasted Asparagus
Old Fashion Baked Beans
Deviled Eggs
Rosemary Foccacia
Dinner Rolls
Sour Cream Cheesecake topped with cherries
Strawberry Roulade
Mint Tea

Easter is one of our favorite holidays here at Waterberry Farm. Usually the whole family gathers at the farm to celebrate the Resurrection of our Lord. This year unfortunately, for various reasons, not everyone could make it to the farm for Easter. In spite of missing the ones who didn't make it home, we had a great day. The weather was lovely so we set up a table on the porch and ate outside. It was a gorgeous day to sit on the porch, sip mint iced tea, talk, and watch the squirrels chase each other from tree to tree. 

Our Easter menu is pretty much the same from year to year. One item we always include are these old fashioned baked beans. These are a family favorite. This is a very old recipe from the Mennonite side of the family. These beans are nothing like traditional baked beans from a can. For starters they are made with lima beans. Once you've had these baked beans they may become a part of your Easter menu too!

Old-Fashioned Baked Beans

2 cans large lima beans (or 2 cups dried lima beans soaked overnight and cooked until tender)
1/2 cup yellow onion, diced
1/2 cup green bell pepper, diced
1/3 cup brown sugar
1 teaspoon dried mustard
1 14.5 ounce can diced tomatoes
salt and pepper
4 slices bacon

Preheat oven to 325 degrees.
Drain the lima beans but reserve the liquid. In a large shallow baking dish, combine the beans, onions, bell pepper, brown sugar, dried mustard, and diced tomatoes. Season to taste with salt and pepper. Lay the strips of bacon in rows across the top of the beans. Bake the beans for at least 2 hours. Checking periodically. If the beans start to look a little dry, pour a little of the reserved liquid from the beans over the top. You may not need to add any of the liquid to the beans. Only add it if the beans begin to look dry they've finished baking. Let the cooked beans cool a bit before serving, about 10 minutes.

Here are just a few more pictures...to make you drool!


Yes, this did taste as good as it looks!

Sunday, March 18, 2012

What's new at Waterberry...


With Spring just days away, I wanted to show what's been going on around here for the past few months. One of our green houses got a new cover. The cover was ripped off in a storm last year. Replacing it is quite a process! Lots of hands an NO wind are required.

The new cover ready to go!

A ball tied in the plastic with a rope. The ball is tossed over the top to someone on the other side. That's how we get the cover over the top!

Everyone grabs a ropes and pulls until the cover is in place.
 We picked a sunny day in early February to get the job done. It felt like a calm day but as we started putting the new cover on a light wind made the job quite a bit more difficult, but in the end we got the job done!
Ready for a new growing season!


Tuesday, October 11, 2011

A rainy day in Autumn

Here area few pictures from a rainy Autumn day on the farm. Fall is a beautiful time of the year!

Monday, July 18, 2011

Making Chow Chow

The origins of chow chow is somewhat debated but basically it was a way to preserve the vegetables at end of the growing season. It's a pickled relish made from a combination of many vegetables. It can include a variety of vegetables such as cucumber, peppers, celery, corn, lima beans, carrots, peppers, onions...etc.  Chow chow can be eaten by itself or as a condiment on hot dogs and hamburgers, with mashed potatoes or pinto beans. This recipe is an old Pennsylvanian Dutch chow chow. It's mustard based and contains a variety of summer vegetables. Southern style chow chows are similar but usually contain spicy peppers, green tomatoes, and cabbage or cauliflower. You could really add almost any vegetable to the mix.

Chow Chow

Ingredients:
1 quart cucumber, diced
1 quart Lima beans
1 quart green beans, cut into pieces
1 quart sweet corn
1 pint green pepper, diced
1 pint red pepper, diced
1 pint celery, diced
1 cup onion, diced
1 Tablespoon dry mustard
2 cups sugar
4 cups vinegar

Bring a large pot of water to a boil. Cook all the vegetables separately, about 3 minutes each, until tender but not soft. Drain cooked vegetables and mix together. In a large pot, combine the, sugar, vinegar, and mustard. Bring to a boil. Add all the vegetables and bring to a boil. Put immediately  into hot mason jars and seal.


Put the hot chow chow into hot quart or pint jars. It's best to wash them in the dishwasher and dry on high heat. Leave them in the dishwasher until ready to use. Make sure your jars have no nicks on the rims and the jars are not cracked. They cannot seal if the rim is nicked. Cracked jars should be discarded. In a small pot or skillet, add about an inch of water. Place the lids for the jars in the water and bring to a boil. Leave them in the hot water until ready to use.

After the jar is filled to about a 1/2 an inch from the top, using a clean damp cloth, wipe the top rim of the jar. If there is anything on the rim of the jar it will not make a tight seal.

Take a lid from the hot water and place it on the top of your filled jar.


Add the ring to the top of the jars and tighten as tight as you can get them. Be careful as you tighten the jars. You may have to wear an oven mitt or use a dish towel when you do this as the jars will be very hot.

Your jars should begin sealing within 30 minutes or so as they cool down. You should hear a popping sound to indicate that they are sealing. The jars are sealed when the "button" on the tops of the lids are flat. If they do not flatten, your jar is not sealed and you must either process the unsealed jar in a hot water bath or keep the jar in the refrigerator. 

Tuesday, July 5, 2011

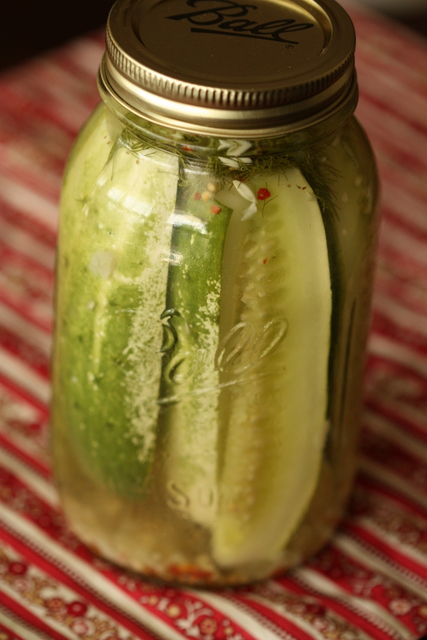
Crisp Claussen-style Dill Pickles

We've got lots of cucumbers at the farm right now. That means it's time to make pickles! This is a recipe for Claussen-like pickles. It's a simple, very quick pickling method. These pickles are a refrigerator pickle. They are not canned. This gives the pickles the crisp snap of a Claussen pickle. They are ready to eat about a week after you jar them and will last, refrigerated, for 6 months to a year.


1 gallon pickling cucumbers, do not use waxed grocery store cucumbers
6 garlic cloves, minced
1/2 tablespoon mustard seeds
6 heads fresh dill, or 6 sprigs fresh dill weed and 1/2 tablespoon dill seeds
pinch of red pepper flakes
1 1/2 quarts water
2 cups cider vinegar
1/2 cup canning salt


Boil liquids and seasonings to dissolve the salt then cool to room temperature. Slice the ends off of the cucumbers. The blossom end of the cucumber will make the pickles soft if left on the cucumber. Then slice the cucumbers lengthwise into quarters add to jars along with the dill.
 Pour over pickles and refrigerate. Shake the jars of pickles at least once a day to redistribute the spices. The pickles will be ready to eat in about a week. They will be good for about 6 months kept in the refrigerator.

If you live near the Slocomb area, we've a lots of pickling cucumbers, right now! As with all of our produce, no herbicides or pesticides are used in the production of our cucumbers. Give us a call if you'd like to stop by and purchase some of our cukes and make your own pickles. Ask about what else is growing on the farm right now.

Wednesday, June 2, 2010

Waterberry hits the road...

Well not Waterberry, it's still right there in Slocomb, but the farm has been shut down for the summer. After all these years of farming we decided it was time for a break from working. So we've closed up the greenhouses, packed up the camper, and hit the road! We're on our way to Alaska for the summer. Yup, we're driving all the way to Alaska. Once there will be spending the summer volunteering at Camp Victory in Sutton.


Don't worry we'll be back sometime in September and be ready to start growing again, but for now this is our home!!


.For updates on our trip and highlights from our summer, check out our other blog at www.lifeintheotherla.blogspot.com

Friday, May 7, 2010

How to freeze strawberries

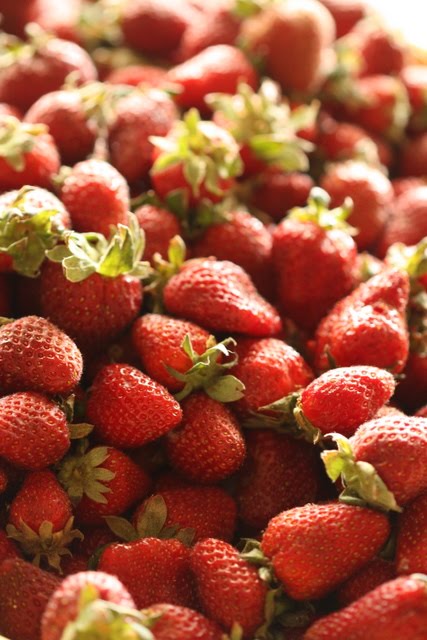
 Our strawberry season at Waterberry, will soon be just a memory. It's sad to see the berry season wind down and the last of the berries picked. Luckily, we know we've got berries put away that we'll enjoy through out the rest of the year. Strawberries can be made into jams or preserves, but the easiest way to preserve strawberries is freezing. There are a couple of different methods that can be used for freezing your fresh strawberries.
The first, and by far the most simple way to freeze your strawberries is, freezing the whole berries. This is the best method for very ripe, red berries. Wash and sort the berries, discarding any bad berries. Hull the berries (remove the green tops and stem) and place the whole hulled berries into plastic freezer bags. Lay the bag flat and try to have the berries in a single layer. Gently push as much air out of the bag as you can, taking care not to crush the berries. I stack mine on a cookie sheets and put them in the freezer. This way they stay nice and flat and be much easier to stack in the freezer, once frozen.

Another way we like to freeze our strawberries is, sliced with a little sugar. This method is great for slightly under ripe or not very sweet berries. It's also great for berries that you plan on using in smoothies. Clean the strawberries the same as for the whole berries, removing the stem and tops. Then slice or quarter the berries into a large bowl. Add about 1/2 cup of sugar for each quart of strawberries you have in the bowl. If your berries are already very sweet you may want to use only about 1/3 cup sugar per quart of berries. Gently stir the sugar into the sliced strawberries. Bag the sugared berries in plastic freezer bags immediately, laying the bags flat on a cookie tray. Gently press out any excess air  form the bags. Place in the freezer. The sugar will begin to draw the juice out of the strawberries, so you want to get them in the freezer fairly quickly.


There are a couple of other freezing methods for strawberries, but these are the two that we use and have found to be the most successful for our needs.
Freezing strawberries is so easy, you have no excuse not to have your own stash of frozen berries!